KTM Forums banner

SAS valve and Charcoal canister removal Duke IV U.S.

67K views 86 replies 30 participants last post by  Recon  
#1 · (Edited)
Alright fellas well I hadn't seen anyone do this with their Duke or at least post it up and since getting the auto tune it was necessary to remove the SAS so it doesn't screw with the Autotune. I had originally bought the SAS valve removal kit thinking that it was the same as the previous years since that's how it was listed online in order to keep the FI light from coming on. I was taking it apart when I noticed that the hole that gets plugged up already is plugged and it doesn't have the solenoid so I basically had no use for it. Contacted the seller (smart moto) and he refunded me the money without having to return it since he wasn't aware. So I bought just the blanking plate for the 690 SMC since they use the same SAS. I'll be updating this as I go along maybe I'll take some pictures in the daylight so everything is clearer and replace these.

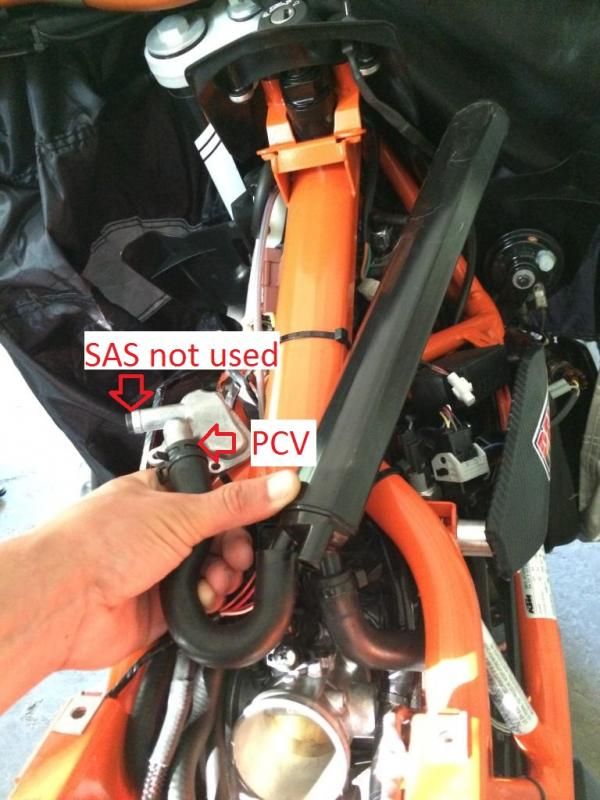
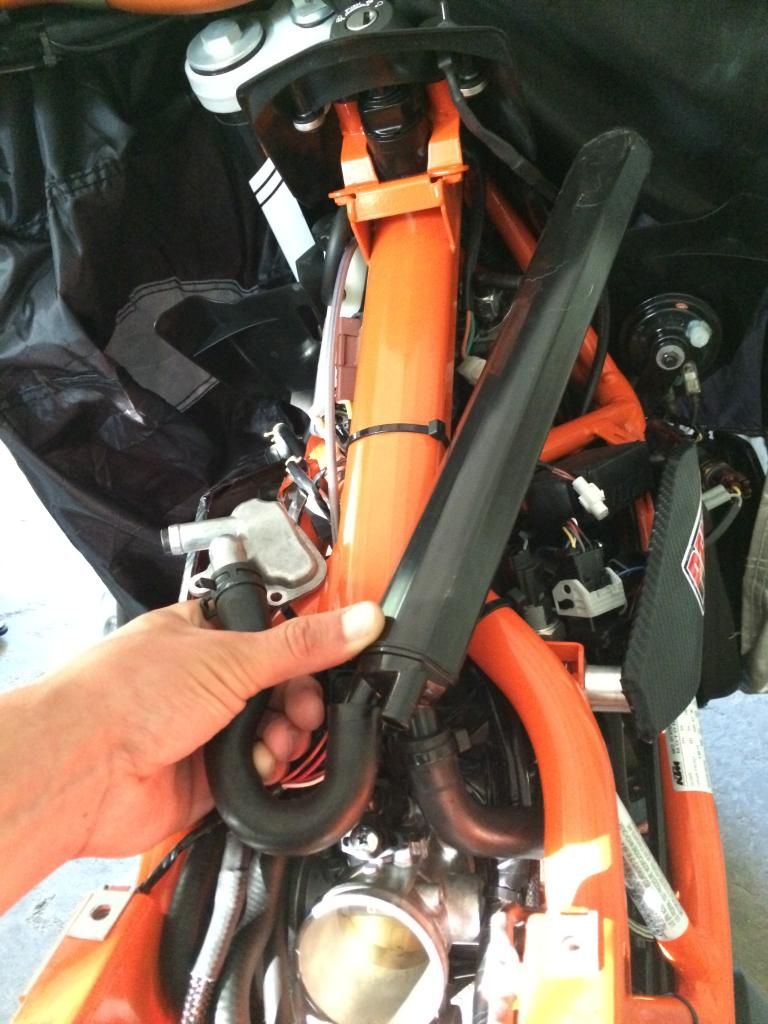
Took the valve off and now on the new model they have this huge plastic can which is an air/oil separator in the middle of the frame that one of the hoses connect to from the SAS which from the plastic tube there's also one that gets routed to the airbox and also another on the bottom that another hose gets connected from the crankcase which is the crankcase breather. By the way in order to get to this the airbox will need to be taken off. I waited till I bought the cam and airbox to do this for this very reason. Got a better picture here you can see where the SAS is connected to the plastic pipe and also the crankcase breather. The only one missing is the top right because that goes to the airbox which is currently off. You'll have to take off your air box and I pulled out the injector and loosened the throttle body to angle it down to remove the air/oil separator.

Here's the SAS blanking plate it was polished but I used some DEI black silicone paint on it so it wouldn't stick out like a sore thumb and blends in.
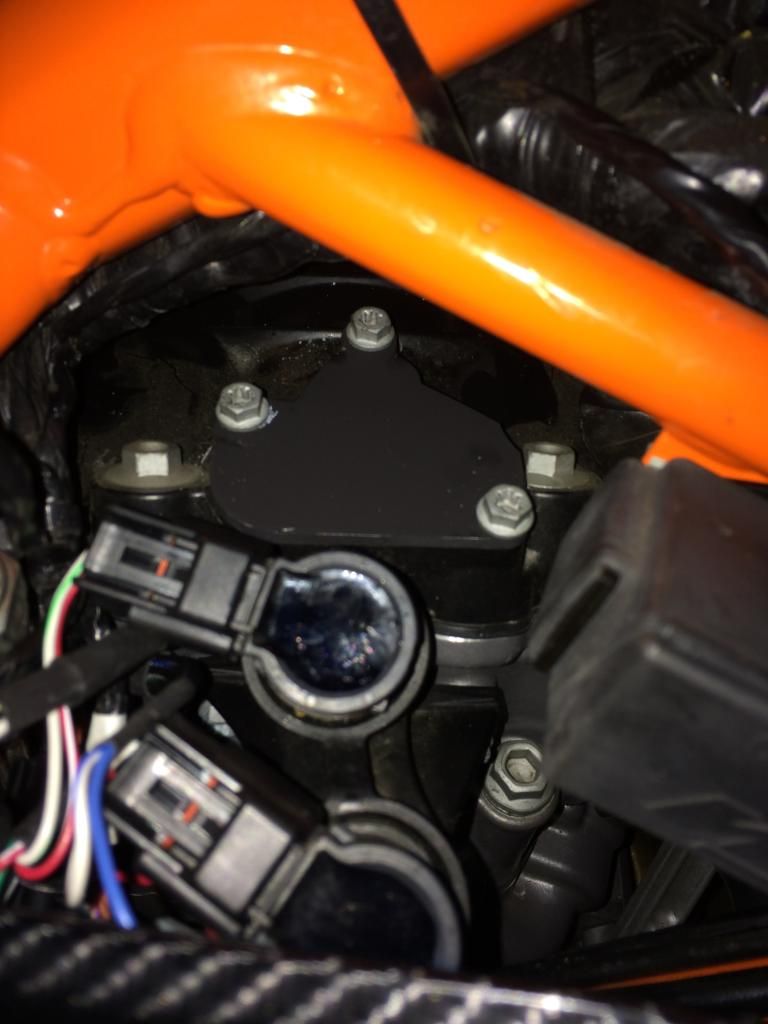
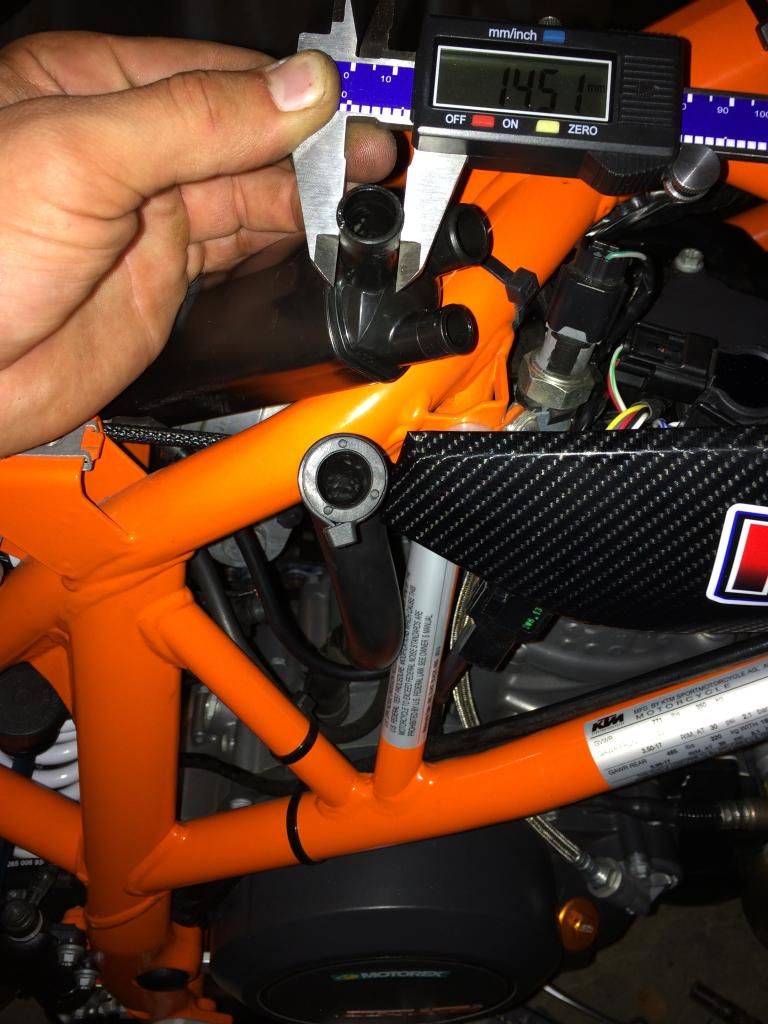
Now all you'll have to do is plug the hole in the airbox which I don't have a plug for yet since I just started this last night but even a piece of duct tape on the inside of the airbox will work if you can't find a plug for it. Now all your left with is the crankcase breather hose. Now I measured the size of the hole and I'll be ordering a small crankcase breather filter so that dirt doesn't get inside and let's it breath and you'll be done with the SAS removal:


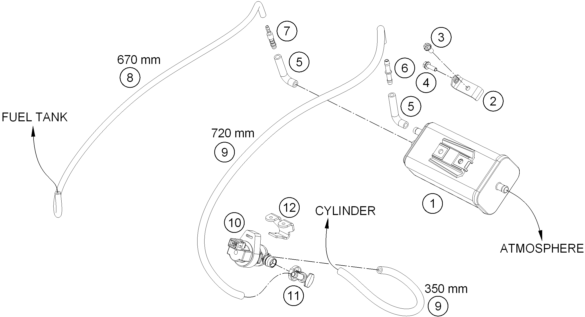
Now for the charcoal canister. This is located behind the battery. You can't see it unless you take your battery out. There's two hoses that are connected to the gas tank that you'll have to remove on the left side of the gas tank. Here's what the whole assembly looks like once removed. Got a better picture of this I placed it where it would go and semi routed the lines to where they went so you guys get a better idea.
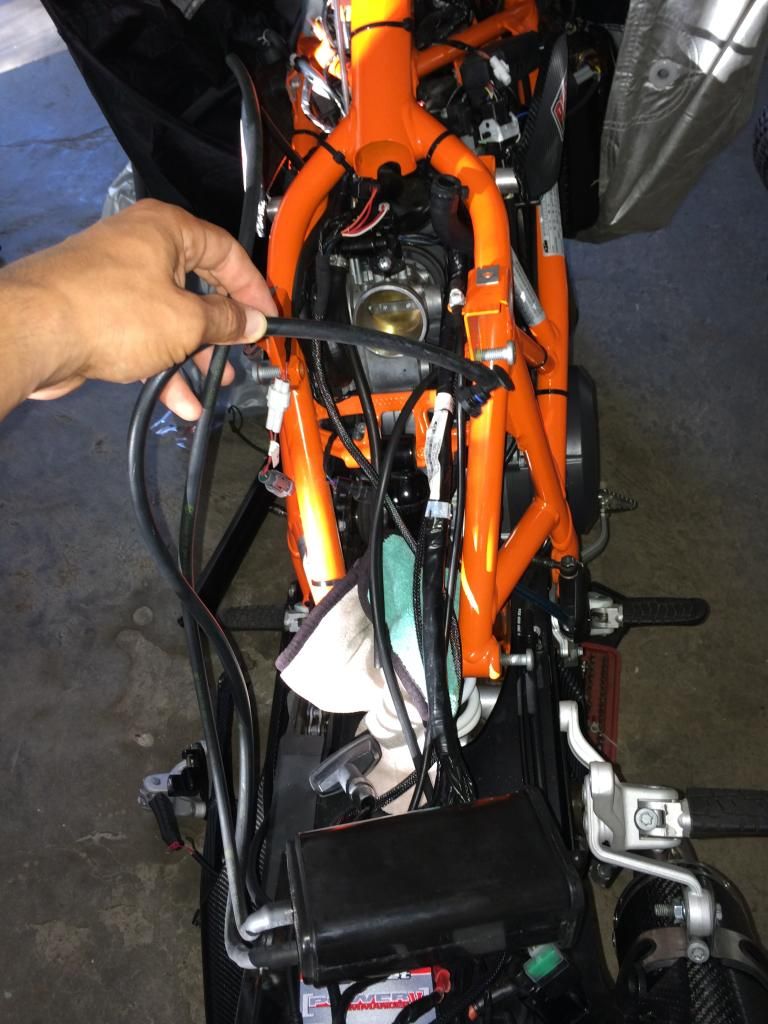

Now the second gets connected to the solenoid which is on the right side of the throttle body (if your sitting on the bike) that you'll have to disconnect. Once you do you can pull the canister out.
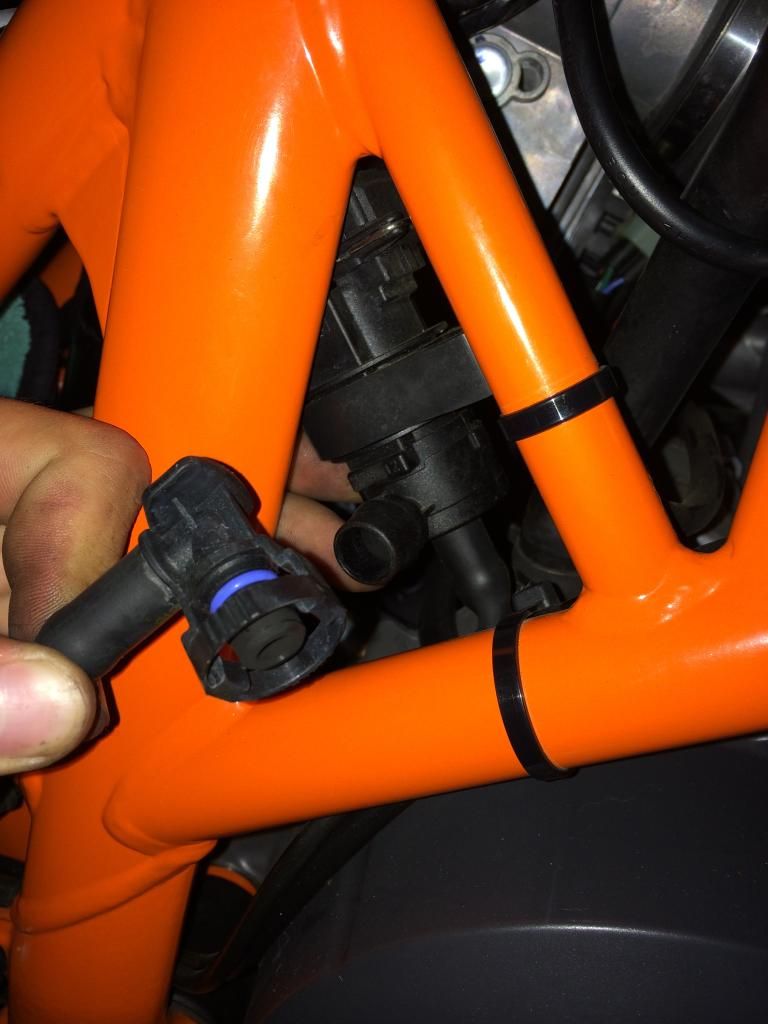

Here is a picture of the hose you'll be pulling off the left side of the throttle body that you will have to plug with a 1/4" plug.
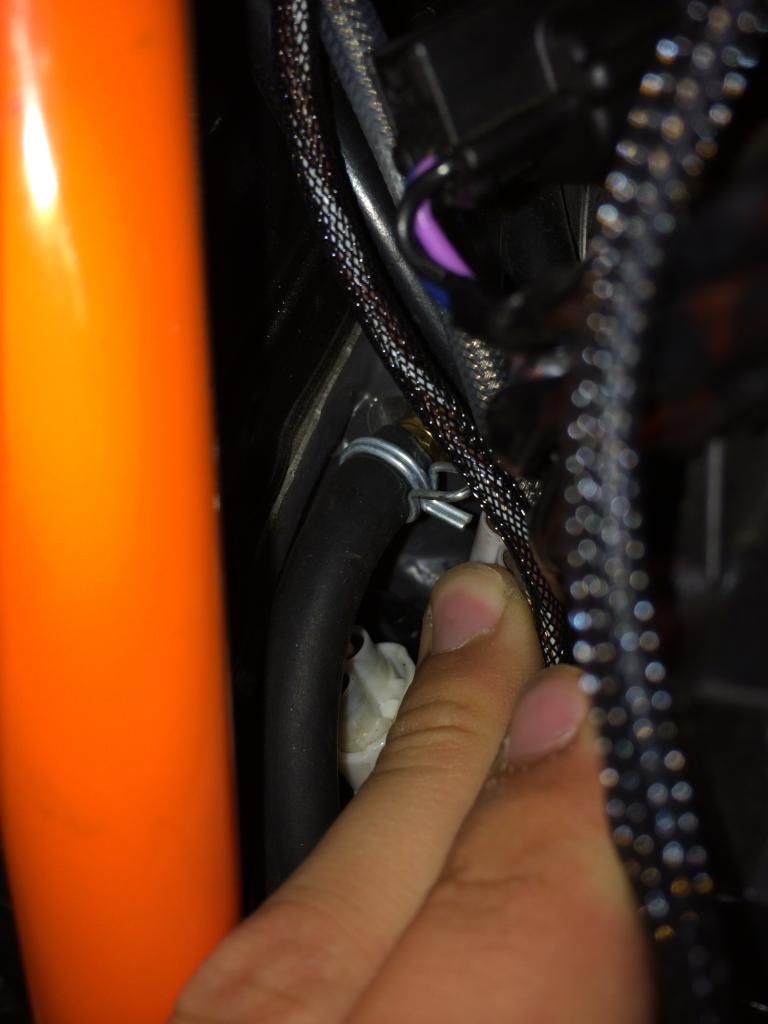

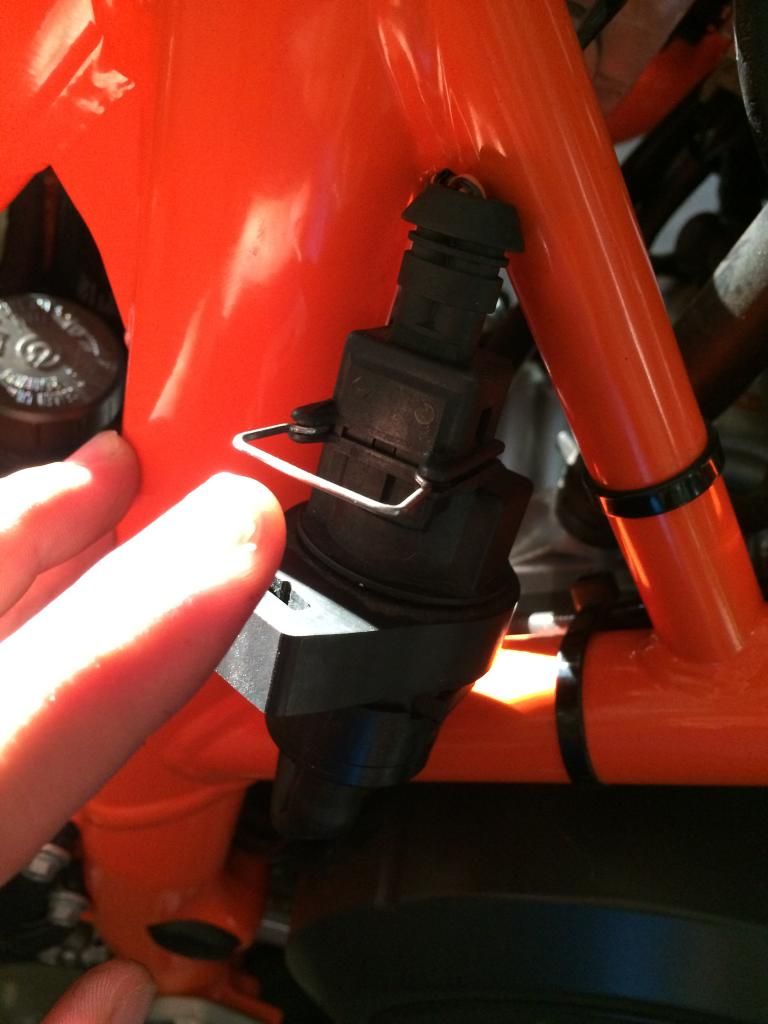
Now to remove the solenoid you'll have to pull this metal clip out to disconnect it. Once you've done that and have pulled out the hose next to he throttle body you can pull out the solenoid. Keep in mind you WILL need a resistor if you pull this off.

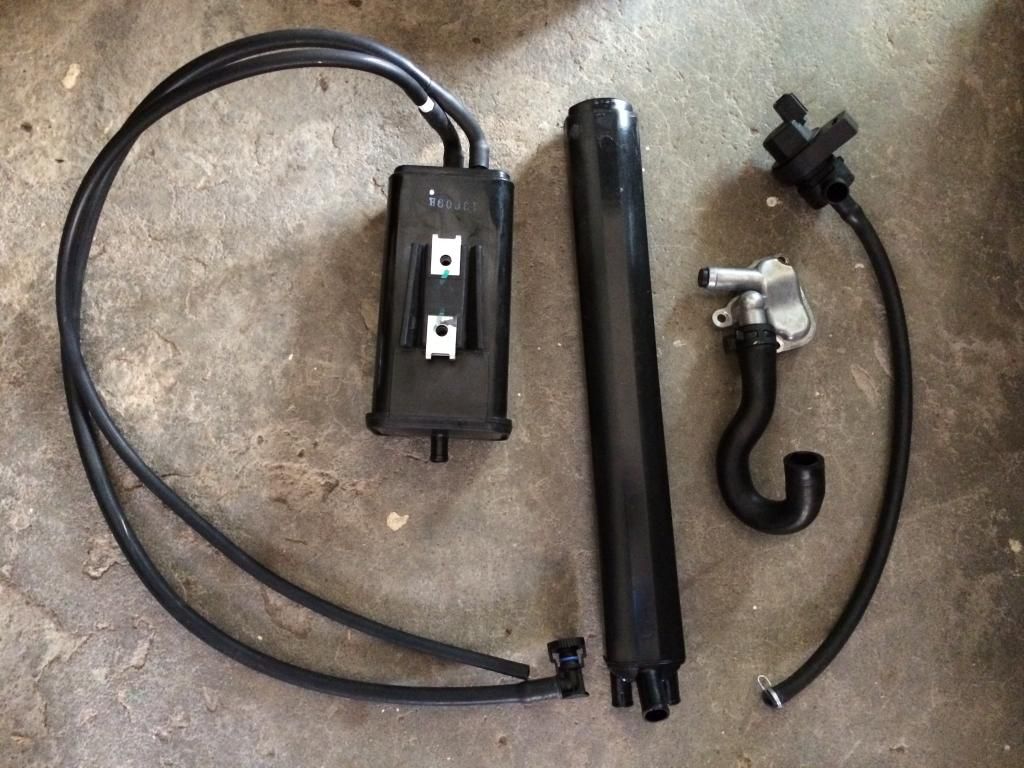
Once your done taking everything off this is what you should have that you don't need anymore. Bunch of emissions crap definitely some slight weight savings there.

HOW TO MAKE YOUR OWN RESISTOR IS ON PAGE 3.
 
#2 ·
Well done.

This should be stickied.
 
#5 · (Edited)
Just saw this. Nicely done.

No FI lights or anything? Any downsides?


j
Well done.

This should be stickied.
Thanks fellas.

Schnell I haven't removed the charcoal canister solenoid yet I need to go get resistors otherwise the SAS won't set any codes off since the solenoid that they used to have isn't there anymore. I haven't started the bike since I'm waiting to install my cam when it gets delivered so I won't know till then. But I'm confident everything will run smoothly. No down sides just less weight and less clutter..the SAS valve removed will make checking your valves easier.
 
#6 ·
OK, so you do need to still short out the solenoid with resistors or something. I wasn't entirely clear in your write up wether or not you used anything for it. Looking forward to what happens!

And for the rad switch? Where did you get it?


j
 
#7 ·
You do if you plan on removing it otherwise you can leave it plugged in. I'll be removing it. The other kit I bought for the SAS came with a resistor so I'm going to try plugging it in to the charcoal canister solenoid and see if it works if it doesn't I'll be picking up some resistors and removing it completely.

I paired the link in the other thread for ya.
 
#9 ·
That's a good question I haven't looked to see if other countries come with it but I would image they come with at least the SAS I've herd of other KTM's not having the charcoal canister. You fellas in different countries should check and I can update my original post that's why I only have U.S. listed. You could easily look under your gas tank and see if you have it. It's silver and right on top of the valve cover.
 
#11 ·
I just got doing the same project on my Duke. I left the charcoal canister as is and left the crank vent hose running into it. I used the emissions block off kit provided by KTM Twins (looks like on back order now). I did not need to plug a resistor into the solenoid connector and am not having any issues with fault codes.
 
#12 ·
Crank hose doesn't go to the charcoal canister it goes to the oil separator. Did you leave the solenoid on your bike or did you remove it? If you didn't remove it like I did then that's probably why you aren't having any fault codes.
 
#16 ·
Not completely I just got it loose and moved it down enough after taking the fuel injector out to make room. What you do have to take off completely is the airbox if you can't tell by the picture is that it's over a foot long.
 
#17 · (Edited)
Great post!


I remember doing some investigation on this awhile ago....especially the charcoal canister and associated tubing.

My investigation started when folks from Europe mentioned fuel was dripping on their valve covers degrading the paint. They also pointed out the source under the tank seemed to be missing a tube that the USA spec bikes have.


I will be leaving these components intact as KTM has neatly tucked these away and I wont have any issues with fuel overflowing or allowing moisture into the tank...or the FI indicator.

I will however install a block off plate - block the crankcase vent at the top of the head mainly to make maintenance MUCH easier!

It also should be noted our bikes actually don't have the conventional SAS plumbing/soleniod as other bikes do - ours is actually blocked :yes:


#18 · (Edited)
I'll be getting a long line of that fuel over flow hose and just routing it to the bottom of the motor so if it does it just spills on the ground so that won't be a problem. I don't know why the FI indicator would turn on because it's not connected to anything that would trip an FI light.

I did make a note of it..it's actually in the first paragraph where I discuss that ours is indeed blocked off already and had bought a kit thinking we did have the solenoid that included a resistor but the. Had no use for it after seeing that.

Thanks for labeling the picture hopefully it helps others.
 
#21 ·
Looks good

Hopefully you will get everything resolved soon and will be able to ride!

If I chose to put a block off plate and retain the oil separator , I may make a Y connection so the unused separator port goes to the crankcase...
 
#25 ·
UPDATE: You WILL need a resistor if you pull the charcoal canister solenoid I'll be posting up how I'll be making mine on here now that I got my bike back together I know you do indeed need one after starting it without it and it tripping the FI light.
 
#26 · (Edited)
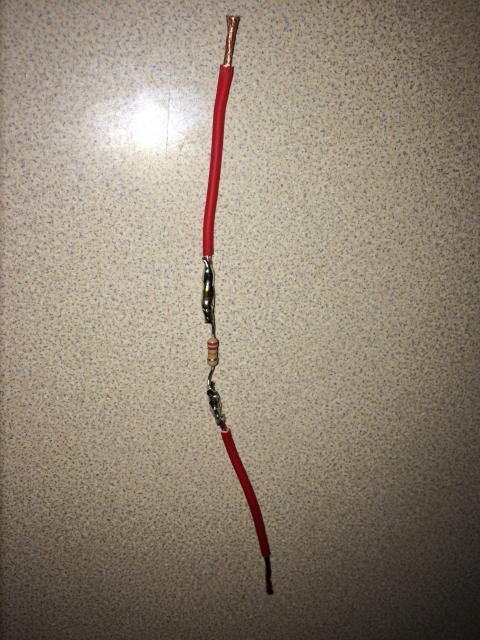
Sorry for the delays fellas here's a little write up on how I did my resistor to keep the charcoal canisters solenoid from tripping the FI light.

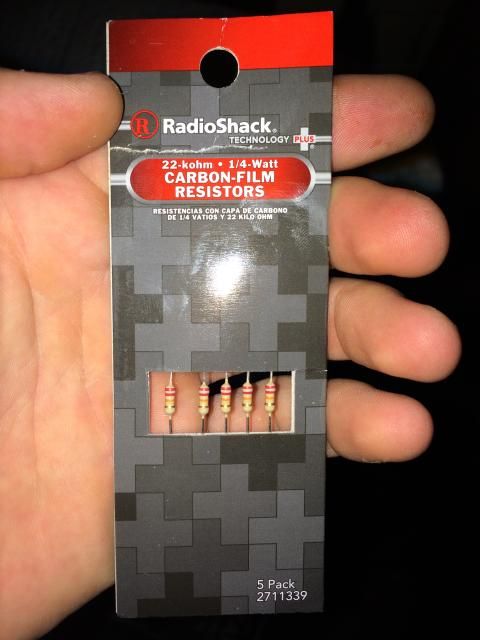
First off go to your local electronics store that would sell resisters. Here's what you'll want. You can also buy them off ebay but you get a ton which I wouldn't need and these only cost me a little over a dollar


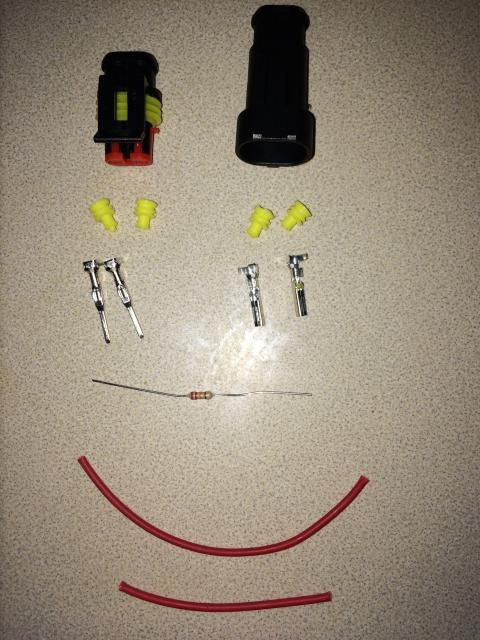
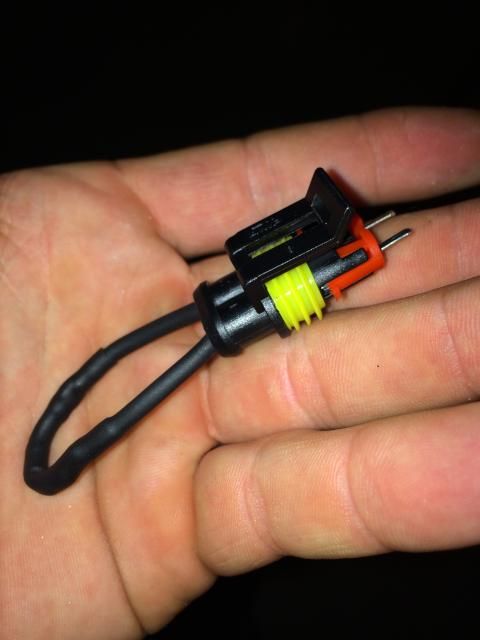
If you go my route I bought an electrical connector from ebay also to make my connection nice and legit looking. You'll also need a little bit of wire. This will be everything you'll need.

I soldered my wires together you could always use electrical connectors for this but I wanted it to be nice and sturdy with how much this bike vibrates.


I used some heat shrink around the two soldered wires and resistors and crimped the wires to insert it into the connector. Once your done with that it'll look like this.

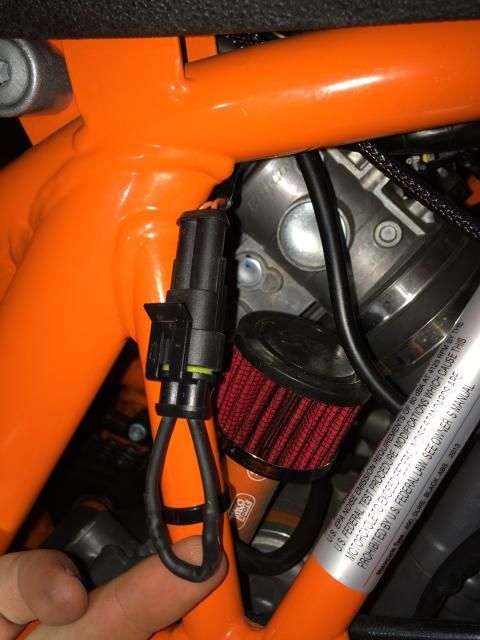
Last step I cut the stock connector about an inch away and plugged the female end of my electrical connector in and voala! All done! Hope this helps you guys out. Again if you have any questions post away.
 
#59 ·
Sorry for the delays fellas here's a little write up on how I did my resistor to keep the charcoal canisters solenoid from tripping the FI light.

First off go to your local electronics store that would sell resisters. Here's what you'll want. You can also buy them off ebay but you get a ton which I wouldn't need and these only cost me a little over a dollar


I did my 2015 690 Duke with a 22k resistor as shown, but still get an intermittant FI light.

The internal resistance of the solenoid removed is 21.5 Ohm, not 22k.

Wondering if a 22 ohm resistor should be used, instead.

I put the solenoid back on the bike till I can make another run to Radio Shack during the week.
 
#38 ·
So can anyone tell me what and how many plugs/covers I will need to completely remove everything? In regards to the Duke IV.
 
#39 ·
One plug for your throttle body and another two if you decide to plug the two on the gas tank so it'd be three total just for the charcoal canister. Then only one of you just remove the SAS that leads to the air/oil seperator or none if you put a crankcase breather on and remove the air/oil seperator. Keep in mind that after putting on the cam I wouldn't recommend taking off the air/oil seperator and using a crankcase breather for some reason it'll spew oil out of it now that I have put the cam in but not before.
 
#40 ·
Ok having had a look through this thread, I believe can leave the Oil/Air separator in situ, and put a hose bung on the cam cover outlet and also its opposite end on the separator to achieve the same effeect, taking the "SAS" element out of the equation, right? And removing the need to actually get a blanking plate, making it cheaper :)

Think I'll leave the hose to the airbox in place so the crankcase can still breathe too
 
#45 ·
Brother if you click on it you'll see all the description you'll need to see to be able to determine that..if you can't based on the info provided in the link I don't really know what your trying to ask..and if your talking about a heat shrink terminal crimper tool you wouldn't need it since these are waterproof just make sure you don't remove too much material that protects the wire.
 
#47 · (Edited)
Huh why would I need to calm down haha?

If I didn't know what that was I wouldn't of gave you a specific name and if you saw what was in the link with the connectors you'd see that there's a male and female terminals that get crimped onto the wires then get pushed into the main body. So don't make something so simple complicated for yourself:turned:
 
#51 ·
Here's two main reasons ppl get rid of this and that's because they'll get backfiring on deceleration and or because they're about to get the bike tuned on the dyno and would mess up the AFR readings. Otherwise it won't affect anything if you remove it.
 
#52 ·
Hey Junkie,
Cool work on this. Always nice to have someone get rid of this **** and post it up to make it a bit quicker for everyone else. So, for the Duke IV, you need 22 kohm, 1/4 watt resistors?

Thanks a bunch man...
 
#53 ·
Thank you sir and that's correct you can see on post #26 I posted up some pics and connectors I used to plug it all in there's easier ways to do it I just chose the way I did it to lee everything clean and original looking.
 
#54 · (Edited)
Thanks to the O.P. and all other contributors to this topic, it made my work easier.

Installed a full Akra on my 690, a smog block plate, and got rid of a

bunch of extra garbage.

Along with a Lithium battery, this got the bike down from 362 to 347,

with a full tank of gas.

BST wheels and a front end upgrade will be next.

No BST wheels specifically for the 690, so I'll make BST wheels from

another bike work.

Image


Image